Sunday, September 15, 2013

Resolution

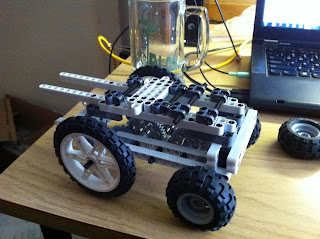
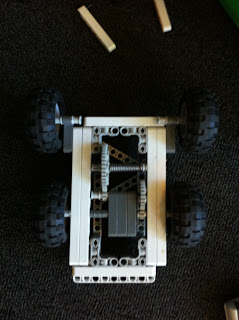
After the adaptation of Mark 2 had failed, due to it's range and the overall adaptation of chassis to receive the new drivetrain, we decided it was time to once again make a new chassis. The main issue was that the gears were binding. In addition that when the larger 3 3/8" wheels were put on the car the amount of torque transferred from the powertrain down the drive train wasn't able to move the car.


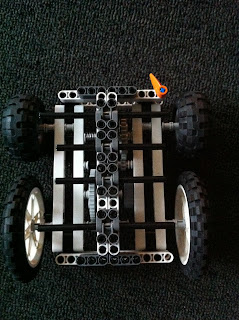
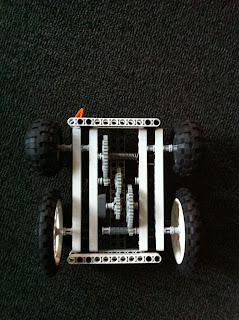
Taking the lessons learn from Mark 2 and applying them  to work on the Mark 3 the chassis started to take shape. One thing that was learned during the adaptation of mark to was that the with the new gear ratio we would need more room because the 40 tooth gear took up more space. In order to compensate for this I made the members that were perpendicular to the chassis more space efficient while still trying to make the structure more rigid. It was very important to consider torsion as a lack of rigidity would create jacking on one side of the car causing it to go sideways, lowering accuracy and precision. In addition to those supports a superstructure was added to add anti-torque members. This was modeled and inspired by cars and how their under carrive which is shaped like and 'I'. With the addition of these things the Mark three was able to go farther than any of it's predecessors..
One draw back though is that in order to keep the drive train on on on lego beam (which was a problem of the Mark 2 adaptation) there were less places to ad support so  the car didn't go nearly as straight as one would hope.


To compensate for that many other truss systems were added, but it only ended up doing more harm in creating gear binding than good so it was decided to move the extra systems unless the jacking became really bad. Even though it didn't exactly track straight, this is only in the first few feet of travel which means that if you angle the car it has more than enough travel to go the 15 and straighten out too. The turning problem was also partially rectified by adding a slight indicator part as a sight to see how much one has to compensate for the initial radial motion of the car. All in all the design was fixed and now the car is ready to do what it needs to do at competition.
Saturday, September 14, 2013

Issues in Range

As of last post I made the mark 2, which was a redesign from the original prototype (Mark 1). After receiving the much need parts that I thought would make mark 2 (Figure 1.1 - 1.2) more range worthy I ran into major problems with lack of torque. If I add in the required part to get to the 15' that is required in the product specifications, the mousetrap spring would have so little torque that it didn't even travel past 6'.

Figure 1.1 Gearing to Mark 2 Adaptation

Figure 1.2 Adaptation of Mark 2
 In an effort to diagnose the torque problem I moved back to the smaller wheels (Figure 1.3-1.4) which bumped the travel to about 10'. The only problem here is that with my calculation the care would only be able to reach 12' at most and obviously that is not the case missing the max distance by 2'. 

Figure 1.3 moving back to smaller wheels
 Now since I have the weekend I don't have much time left to resolve the issues. In short I need to increase the energy in the spring, and reduce friction to get it to travel farther.


Sunday, September 8, 2013

Research

I spent some time trying to determine how each of our designs would work.  I found lots of information on the traditional design, such as increasing the length of the lever arm, the wheel radius, and the wheel friction. A good way to secure a longer lever arm to the one already on the mousetrap was using zip ties. These are strong, simple to use and allow for the lever to be replaced. Most of these designs used CD's for wheels which, while being light and having large radii, are flimsy and easily breakable and probably not suitable for a child's toy. They also had rubber bands around the CD's for friction. This seems a simple and effective method which could easily be applied to other wheel designs.  I found less information on the pull-back design. It seems that this design has not been widely used for mousetrap cars. I did find a video in which someone took apart a pull-back toy car, revealing the gearing inside. While the system of gears itself did not seem overly complex, it utilized a coil spring, whereas the mousetrap has a torsion spring. We thought of a few ways to attach the torsion spring to a gear, including gluing, welding, and bending the end of the spring around a hole in the gear. We were concerned that the force exerted by the spring would either break the gear or the method used to attach the spring to the gear. This could be detrimental to both the function and the safety of the car. Also, it would be very difficult to find gears that would fit into our Lego design, and both difficult and time consuming to build them ourselves. 

Improvements

Through tinkering with the Lego design a bit more we decided it was the best course of action for our car. Although the weighted objectives table stated that the build would take 2-5 days which was a fair estimate we decided that we had the budget to spend that time developing the pull back car design. With that in mind and no longer an issue the pull back design definitely has a lot more strengths than mouse trap design. 

In order to experiment with this design we tried a bunch of different configurations which was very easy having the entire car except the spring being build out of lego's. After thorough investigation our first prototype had served it's purpose and we figured out what issues were holding back the design from its full potential. The major issues were the limited gearing ratio which needs to be increased to get the travel that we need. Also in order to increase travel distance we also need a bigger wheel/tire radius. Also we learned that the farther the spring is would the more the chassis would torque and twist so we need to compensate for that too. In addition the axle that hold the spring and it's gear also need to be held tighter so that the gear stays straight and doesn't skip teeth when in high tension.

Mark 1 Top
Mark 1 Side 
Mark 1 Bottom

So from all this information we decided that nothing more can be done with the prototype and it was now time to refine the design. Unfortunately the gears and wheels haven't come in yet so for now I used the same gearing and wheels but the chassis was entirely redone.
Mark 2
With these changes that car now work really well, barring that I don't have the resources yet for the correct gear ratio, or wheels. I'm sure once those come in we will have a fully functional car that meets all the customer needs and as well as the challenge.


Tuesday, September 3, 2013

Tinkering (Starting the build)

Even though we went through concept finalization I wanted to tinker/toy with the pull back car design. This was to exercise more of an engineering method where one builds a prototype to justify ones conclusions. This was more of a small scale proof of concept to see what one could achieve without investing too much time is the design didn't work out; so more breadth than depth. My initial design was basically directly driving the wheels with a 8:40 (1:5) gear ratio which basically had the travel of about 6 inches or less before the spring reversed and stopped the car like I knew it would.


The next thing I tried was to add a more ratio to the gears having a 24:40 and then a 8:24. When doing the math I figured out that it was a ratio of 3 to 5 multiplied by the ratio of 1 to 3 which is again 1 turn to 5 turns which is exactly what I had before. At that point I realized how dumb I was and quickly researched gear ratios. Another thing I also noticed was that because there was so much force on the chassis from where the spring was mounted that the chassis itself and the axles began to bend and torque a bit.


So after I figured out was configuration I figured out what the correct gear ratio should be. So now with the gearing changed to 40:8 x 24:8 the overall ratio was now 15:1 or 15 revolutions of the drivetrain for every one turn of the spring! Although I can only turn the spring about 1 to 3/4 before the axle starts to bend I think this is a great start and shows promise in the pull back powertrain. This was great proof of concept but bears some greater challenges if this design is going to go any farther. A couple of things to note are how important weight is on the drive wheels for a system like where every ounce of energy counts. Also that since this system stores no momentum because when the spring runs out the car stops immediately which will be a huge concern aiming for anything higher than about 3 feet. Lastly the biggest challenge will be trying to strengthen the legos. Although this prototype seemed okay it really pushed the limits and stresses of the legos. I will either have to revamp the design or move it into another building material.


All in all a great day with much success but more than that a lot of lessons learned.

Concept Finialization

In order to choose out of the ideas that we both had for the project we needed to make a weighted objectives table to really weed out the best design possible for our car. This helped us seed each of the faults in certain ideas, and the relative strengths of others and choose what our final concept of the car will look like.
Powertrain Design Table
Pull Back Geared Design
Traditional Lever Arm and String Design
Cost - How much each design would cost
Cost of a mouse trap as well as gear set to match the desired ratio from the spring to the wheels
Cost of the mouse trap as well as the string to attach it to the axel

1 + 10 = 11$
1 + 2 = 3$
Time – How long would it take to develop
Modeling the design of a pullback toy car. No clear instructions or design. Might have to order parts online
Clear instruction and videos online explaining how to do this design. Time tested and proven

Estimation:2-5 days
Estimation:1-2 days
Safety – How safe would it be for the customer
If implemented properly user should just have to pull back car since wheels are directly connected to spring
User will have to be able to set mouse trap which could be dangerous if user in not careful or is strong enough. To get around this we might have develop something else to set and release the spring for safety.

Most 5 year olds
Most 8 year olds
Durability – Probability that the design would fail
Mousetrap spring may be too strong for gear system. Not very well tested. May cause failure.
Well tested. Not very likely to fail if previous designs followed.

Durable excepting failure
Durable
Effectiveness – How effectively does it complete the challenge
If implemented properly spring will have enough power to get there and since the spring is directly driven will also brake car too. To control distance vary amount person pulls back car.
Not system for braking. Vary distance by changing length of lever arm.

Meets the challenge, precise control
Meets the challenge, average control at best

Time is a huge concern in this project, so the traditional design seems that it would fit us best. Although with a very meticulous schedule the other design might also be pulled off with great success as it does have more features that are going for it. Even so, I think something that is time tested and proven, and is also simple might be better for what this project demands because it meets all the requirements. Recommendation:  Traditional Lever Arm and String Design


Chassis Design Table
Wood - Frame from mouse trap
ABS Plastic – Lego Pieces
Cost - How much each design would cost
Included in cost of trap that is needed for project regardless. Counted as zero as to not be counted twice
Using personal set of Lego pieces which is a donation from me, or in other words free.

0$
0$
Durability – Probability that the design would fail
After considerable uses, wood in trap might be strained to the point of braking. Will withstand drops from 5 feet.
After a lot of use stress of use plastic may stretch and deform but won’t break. Will withstand drops form 5 feet

Durable till wood gives out
Durable
Safety – How safe would it be for the customer
Possibility of split wood or splinters
Unlikely that Legos will break and become hazardous
Broken Legos don’t make sharp edges

Most 8 year olds
Most 5 year olds
Effectiveness – How effectively does it lend itself to the challenge
Acts as a place to mount other parts of the car. Already can support spring
Acts as a place to mount other systems of car. Need to build support for spring

Has been used effectively
Adjustability/Usability – How can it be adjusted
To mount systems to the chassis you need to drill into the wood or mount with wood screws. Threads may strip
Can slide along the pre made holes in Lego. Already have smooth holes for axels to go through, as well as other attachments

Is adjustable but it only limited
Is fully adjustable to extent of holes

This decision seems to lean in favor of a plastic Lego construction chassis due to its durability, and its pre-built adjustability. Recommendation:  ABS Plastic – Lego Pieces


Drivetrain (Wheels and Axels)
CDs
Lego Wheels
Cost - How much each design would cost
Cost of CDs (Might have to by a pack) and Axels.
Using personal set of Lego pieces which is a donation from me, or in other words free.

13$
0$
Time – How long would it take to develop
Need to account for how to attach CD’s to axel and make them straight
Premade spaces and everything fits together nicely because it’s a kit

Estimation:2-3 days
Estimation:1/2 a day
Durability – Probability that the design would fail
CDs likely to break under small stress
After a lot of use stress of use plastic may stretch and deform but won’t break. Will withstand drops form 5 feet

Durable till wood gives out
Durable
Effectiveness – How effectively does it complete the challenge
CDs have been used in the past but effectiveness at least according to different online videos is less than suitable due to low friction and wobble of wheels.
Has lots of traction, can go straight, and is really adjustable

Effective but less than would be optimal
Meets the challenge with added bonuses in implementation

This decision is fairly easy because there is nothing going in favor of the CDs. Recommendation: Lego Wheels


Customer Needs

For our class we had to make a table of customer needs that were to be derived from the product specifications as given by the grading rubric. Here we thought as though our customers were children, and the mousetrap car was a toy.

*Based on the idea that the mouse trap car is some type of hobby kit/toy for consumers
Customer Needs
Product Specifications (As grading rubric)
Cheap and available source of mechanical energy
Mousetrap is the only source of energy
Need car to move an suitable distance to keep children entertained
Controlled travel distance of 3-15 feet
Need car to not move farther that a user would want to run to get it (e.g. Rolling out into the street by accident)
Maximum travel distance is >15 feet
Car is easy to transport when playing with
Maximum width when ready to release >= 12 in
Car is easy to transport when playing with
Maximum length when ready to release >= 24 in
Safety
Passes government toy certification (CPSC)
Sturdiness
Withstand a drop from 5 feet,  and 5lbs
User Interface
80% of 5-10 year old children should be able to use it.
Aesthetics
Although mostly subjective, product should be generally aesthetically pleasing


More Brainstorming

Looking back at my original ideas I actually came up with some more that also might add more tunability and safety to the car. The first big thing is an adjustable lever arm and tensioned string system for the drive. What I was thinking is that in order to make sure we have the optimum lever arm we could use bolt, or a threaded rod to act as a lead screw adjusting the lever arm. Also along with this I'd probably stick the line through a shaft collar in the Lego axle also making it adjustable.

Sketch in Notebook for Adjustable Lever Arm

Another idea was making some sort of safety procedure to load and release the mouse trap. In addition I was thinking about actually making some sort of hook, or tool that would load and release the trap thereby making it safer for the user which no matter how old setting off the trap accidentally would be dangerous.